A splashback may occupy a relatively small area of a kitchen, but it sits at the point where heat, water, grease and daily cleaning meet. That makes it one of the hardest-working finishes in the room. Knowing how to choose kitchen splashbacks is not simply a matter of finding a colour you like. It means balancing the look of the kitchen with the way you cook, the number of joins you are comfortable with and the upkeep you can realistically expect over time.
A carefully chosen splashback can make cabinetry and worktops feel more considered, protect the wall behind the hob and sink, and give the room a sense of finish. A poorly chosen one can be difficult to clean, visually overpowering or surprisingly expensive once templates, cut-outs and fitting are considered.
Start with how your kitchen will be used
Before comparing materials, think honestly about everyday life in your kitchen. A household that cooks frequently with frying pans, sauces and spices will place very different demands on a splashback than a kitchen used mainly for light meals and entertaining.
Behind the hob, the material needs to cope with heat, splashes and regular wiping. Behind the sink, water resistance and tidy sealing matter most. If your kitchen has both areas close together, a continuous material can reduce visual breaks and make cleaning easier.
It is also worth considering who uses the room. Young families may prefer a surface that can be wiped quickly without worrying about grout lines. Keen cooks might prioritise a heat-resistant option behind a range cooker. In a quieter, more decorative kitchen, texture and character may carry greater weight. There is no single best material – there is only the most suitable one for your home.
Choose the material before the colour
Colour gets attention first in a showroom, but material should lead the decision. Each option brings practical benefits as well as compromises.
Tiles offer character and flexibility
Tiles remain a popular choice because they can suit almost any style. Gloss metro tiles work well in classic and shaker kitchens, while large-format porcelain can create a cleaner, more contemporary effect with fewer grout joints. Patterned tiles can introduce personality where the cabinetry is deliberately simple.
The trade-off is grout. Even when sealed, grout can require more attention than a smooth sheet surface, particularly behind the hob. Larger tiles reduce the number of lines, but they may create more offcuts around sockets or awkward edges. The quality of setting-out matters as much as the tile itself: poorly positioned cuts can distract from an otherwise beautiful kitchen.
Glass creates a clean, reflective finish
Toughened glass splashbacks offer a smooth, joint-free surface that is easy to wipe down. They are particularly effective in smaller or darker kitchens because they reflect light, and they can be made in a broad range of colours.
Glass does show smears and water marks more readily than some matt materials, especially in dark shades. It also needs accurate measuring because cut-outs for sockets, switches and extractor controls are produced before the glass is made. This is not usually a material to select before the final kitchen layout is confirmed.
Stone and quartz give a cohesive look
Taking the worktop material up the wall can produce a calm, high-quality result. Quartz and natural stone work especially well where homeowners want a continuous, tailored appearance rather than a separate decorative feature.
Quartz is non-porous and generally straightforward to maintain, although it should not be assumed to be suitable for every high-heat application directly behind every type of hob. Natural stone has depth and individuality, but some varieties need sealing and may develop a patina with use. These materials also tend to be a higher investment, particularly where large pieces, upstands, mitred edges or detailed cut-outs are involved.
Stainless steel and metal suit practical spaces
Stainless steel is a sensible choice behind a serious cooking area. It is heat resistant, hygienic and at home in both modern kitchens and more professional-style designs. Other metal finishes can add warmth or drama, although they need careful selection to avoid a finish that marks easily.
Metal can show fingerprints, scratches and reflections. Some homeowners enjoy the lived-in character that develops; others would prefer a quieter, more forgiving surface. Viewing a full sample in different light is worthwhile before committing.
Laminate and acrylic can be cost-conscious alternatives
Certain wall panels and laminates provide the look of stone, timber or a bold colour at a more modest price point. They can be an attractive option for areas away from intense heat, or where the overall budget needs to work harder.
Their suitability behind a hob depends on the product specification, clearances and appliance type. This is an area where an honest conversation at the design stage prevents an attractive choice becoming an impractical one later.
Coordinate with the worktop, not just the cabinets
The splashback connects the horizontal worktop with the vertical cabinetry, so it should be chosen alongside both. A kitchen with strongly veined worktops often benefits from a quieter splashback. Continuing the same quartz up the wall can look striking, but a full-height veined surface may feel busy in a compact room.
Conversely, simple pale worktops and plain cabinetry leave room for a feature tile, coloured glass or an interesting texture. The aim is not to match everything exactly. It is to create enough contrast that each material has a purpose, without competing for attention.
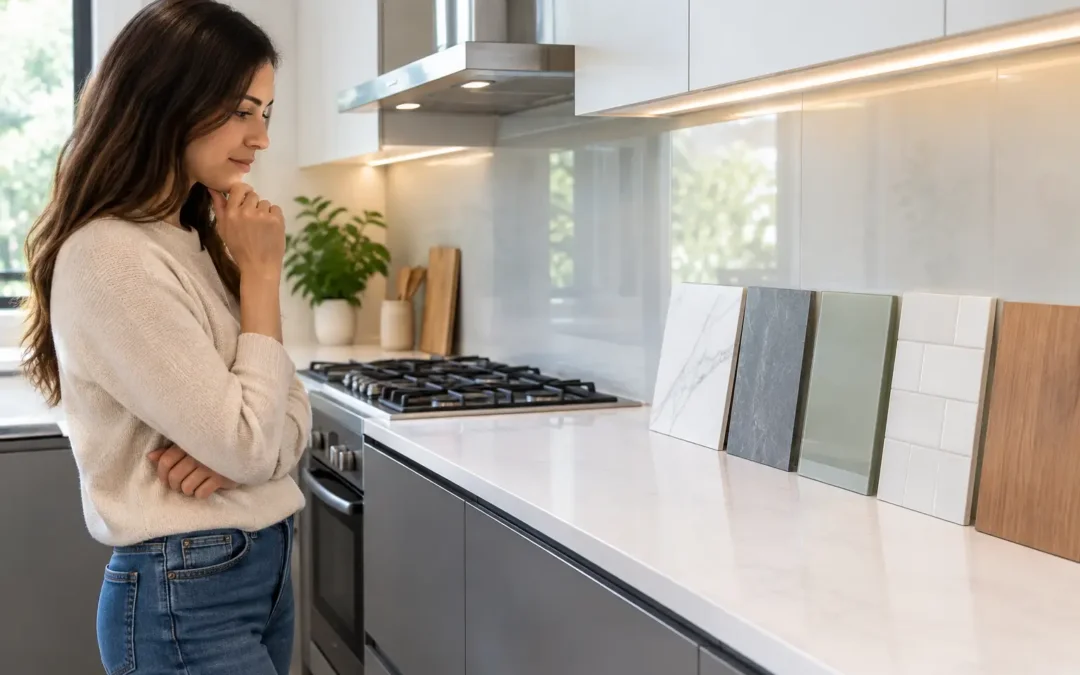
Take samples home if possible. Showroom lighting is helpful, but it cannot fully replicate the daylight, window direction and evening lighting in your own kitchen. Look at samples next to cabinet doors, worktop pieces and flooring rather than judging them in isolation.
Decide how much wall to cover
A short upstand, usually a small raised section of worktop material, offers a neat and economical line around the perimeter. It works well when the main splashback is concentrated behind the hob or sink. Full-height splashbacks, extending to wall units or a shelf, make a stronger visual statement and can be easier to clean.
There is a cost implication. More material, additional templating and complex cut-outs will naturally increase the price. Full-height surfaces are often worthwhile in a focal area, but not every wall needs the same treatment. A considered mix can give the kitchen a bespoke feel while keeping the budget focused where it will be seen and used most.
Plan for sockets, edges and joins early
The details that are least exciting on a mood board are often the details that determine whether a splashback looks polished. Count sockets and switches, consider where shelves will finish, and decide how the splashback meets a window reveal, wall unit or open shelf.
A single large panel may look beautifully uncluttered, but it can be more costly and require access for careful handling. Several smaller panels may be easier to manage, though the joins need to be positioned thoughtfully. With tiles, consider whether the layout should centre on the hob, the wall or the window. A symmetrical layout is not always possible, but it should look intentional.
Sealant lines also deserve attention. They should be neat, colour-appropriate and designed to accommodate normal movement between worktop and wall. This is a small detail with a large effect on longevity and appearance.
Think about cleaning before choosing texture
Smooth glass, quartz and large-format porcelain are generally quick to wipe down. Textured tiles, deep grout lines and heavily brushed metals may need more regular care. That does not make them poor choices – it simply means choosing them with realistic expectations.
Avoid harsh abrasive cleaners unless the material supplier specifically permits them. Even durable surfaces can lose their finish through the wrong cleaning routine. For natural stone, use products intended for stone and keep up with any recommended sealing. The best splashback is one you will be happy to maintain, not one that feels like a chore after the first few weeks.
Let lighting support the finish
Under-cabinet lighting can transform a splashback, revealing the depth of a stone surface, the gloss of a tile or the colour in a glass panel. It can also reveal every fingerprint on a very dark, high-shine material. This is not a reason to avoid dramatic finishes, but it is a reason to see samples under warm and cool artificial light before making a final choice.
If you are planning open shelving, pendant lights or wall lights, consider the splashback at the same time. The materials should support the overall scheme rather than being selected as an afterthought.
At MBK Design Studio, we find that the strongest kitchen decisions happen when worktops, cabinetry, lighting and splashbacks are viewed together, not chosen from separate samples weeks apart. A showroom consultation gives you the chance to compare combinations and talk through the practical implications before your choices are fixed.
A splashback should earn its place every day: protecting the walls, making cleaning manageable and completing the kitchen you have invested in. Choose the finish that suits your routines as well as your taste, and it will continue to look right long after the novelty of a newly finished kitchen has passed.